Table of Contents
- Channel Configuration
- Metadata Received by Channel
- Managing WhatsApp Business API Profile
- Managing WhatsApp Message Templates
- Rate Limits
- FAQ and Troubleshooting
- Why do I get the "Template [name] does not exist..." error message even though the template has already been submitted and approved?
- Why is my template still shown as "rejected" in respond.io when it has been approved by Meta?
- Where can I view my API keys?
- Can I generate a new API key on 360dialog Hub if I signed up for WhatsApp API via Integrated Onboarding?
- Why do I see duplicate Contacts from the same WhatsApp channel?
360dialog WhatsApp
Updated
by JQ Lee
- Channel Configuration
- Metadata Received by Channel
- Managing WhatsApp Business API Profile
- Managing WhatsApp Message Templates
- Rate Limits
- FAQ and Troubleshooting
- Why do I get the "Template [name] does not exist..." error message even though the template has already been submitted and approved?
- Why is my template still shown as "rejected" in respond.io when it has been approved by Meta?
- Where can I view my API keys?
- Can I generate a new API key on 360dialog Hub if I signed up for WhatsApp API via Integrated Onboarding?
- Why do I see duplicate Contacts from the same WhatsApp channel?

360dialog is an API provider that works directly with WhatsApp. This integration lets you respond to WhatsApp messages directly from respond.io platform.
Channel Configuration
Step 1: Navigate to Workspace Settings > Click Channels.
Step 2: Locate the 360dialog WhatsApp Channel > Click Manage > Configuration.
Step 3: Configure the Channel name, which is used internally to identify the account.
Step 4: Click Done to update the Channel configuration.
Metadata Received by Channel
Different channels provide different set of Contact’s metadata to respond.io platform. Here’s the list of Contact’s data you’ll be able to obtain from this channel:
- Phone number
- Profile name
- Whatsapp ID
Managing WhatsApp Business API Profile
Step 1: Navigate to Workspace Settings > Click Channels.
Step 2: Locate the 360dialog Channel > Click Manage > Profile.
Step 3: Click Sync Profile to obtain the latest WhatsApp Business Profile information from WhatsApp.
Step 4: Edit the following information as needed.
Fields | Description |
Profile Photo | Image shown as the profile picture of the WhatsApp Business Account. An image size of 640x640 is recommended. |
About | Text to display in your profile's About section. The max length for the string is 139 characters. |
Address | Address of the business. Maximum of 256 characters. |
Description | Description of the business. Maximum of 256 characters. |
Email address (in valid email format) to contact the business. Maximum of 128 characters. | |
Vertical | Industry of the business. Must be one of these accepted values:
The business vertical cannot be set back to an empty value after it is created. |
Website | URLs (including |
Step 5: Review the information and click Save Profile.
Managing WhatsApp Message Templates
- Have an approved message template in 360dialog
- Added the approved message template to the Space by syncing the message template
Submitting Message Templates
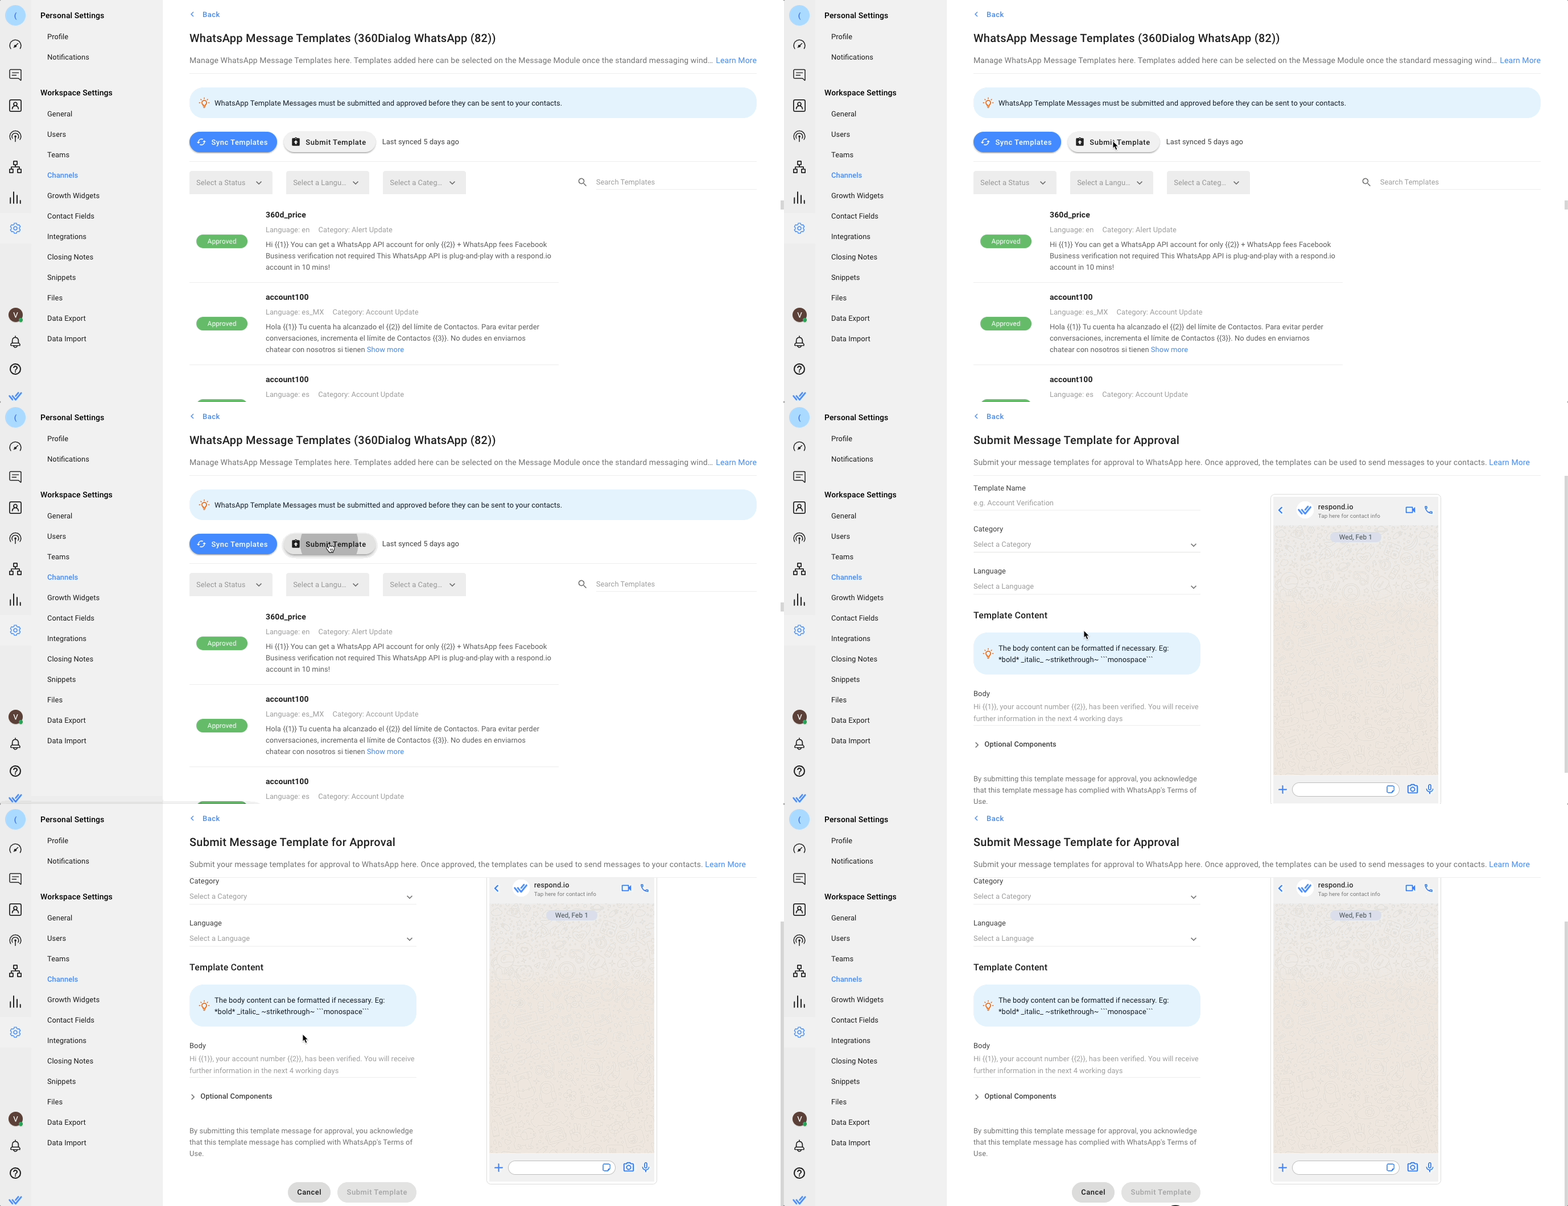
Step 1: Navigate to Workspace Settings > Click Channels.
Step 2: Locate the 360dialog WhatsApp Channel > Click Manage.
Step 3: Click Templates > Submit Template to submit a message template for approval.

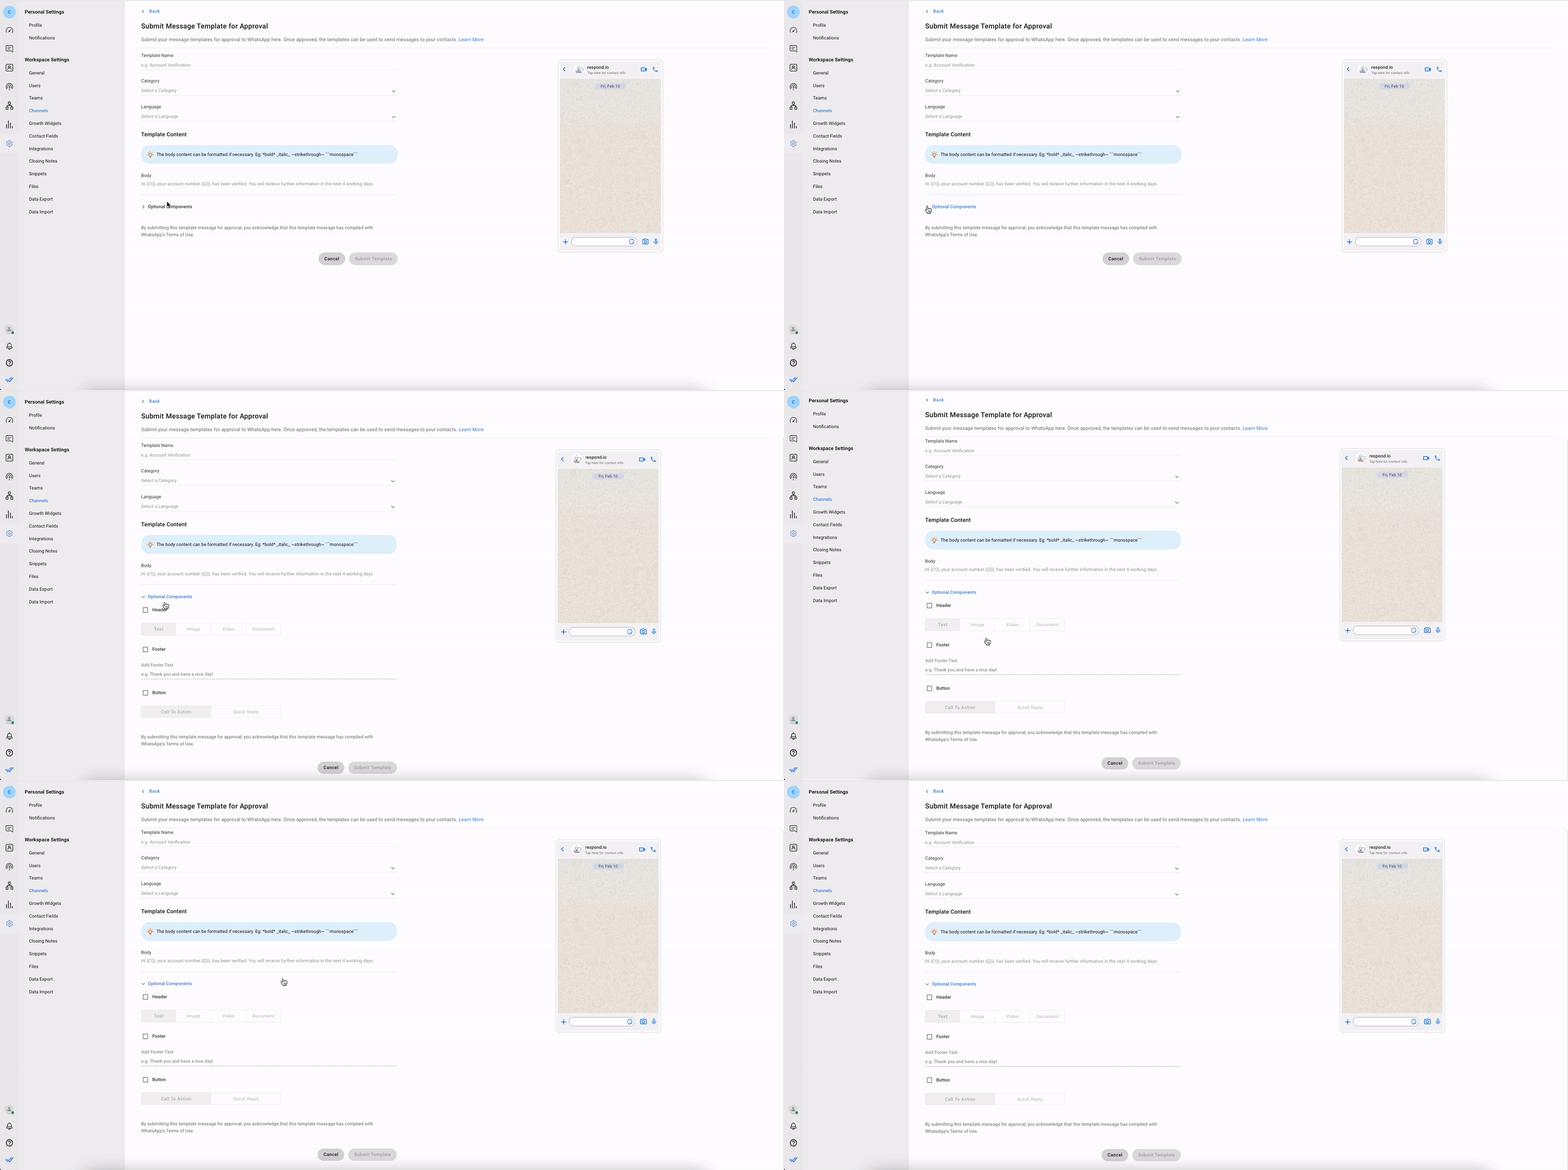
Step 4: Fill in the required information needed to create a template.
Field | Description |
Name | Name can only contain lowercase alphanumeric characters and underscores ( _ ) |
Category | The category of which the message template belongs to. |
Language | The language that the template is written in. |
Step 5: Create the message by filling in the necessary components, then review the message in the preview section. You may include parameters {{1}}, {{2}}, etc. as placeholders to be filled in with personalized content.

Building Block | Description |
Header | The Header is optional and serves as the title or header of your template. It supports the following:
* Respond.io platform accepts uploads up to 20MB in size. |
Body | The Body should contain the most important text of your template. Only text is supported. You may use markdown to format the content of this block. |
Footer | The Footer only supports text and can be used to provide less relevant information in your template message. |
Button | The button adds interactivity to your templates. There are two main types.
* Quick Reply Buttons are supported only on iOS, Android and web platforms, but not on Windows platform. Refer to more details here. |
Step 6: Provide sample value
This is only applicable if you have included any parameters in your message template content.
Syncing Message Templates
Step 1: Navigate to Workspace Settings > Click Channels.
Step 2: Locate the 360dialog WhatsApp Channel > Click Manage.
Step 3: Click Templates > Sync Template to begin the syncing process.
- The message templates will be listed with their corresponding statuses.
- The last synced date time will be updated.
- If your template is rejected, the rejection reason will be displayed below the rejected message template.
The following table lists the possible statuses for the message templates:
Description | Status |
Submitted | The message template is submitted and pending for approval. |
Approved | The message template is approved and can be sent to contacts. |
Rejected | The message template is rejected and cannot be used. |
Rate Limits
A rate limit is the number of API calls an app or user can make within a given time period defined by the channel. Learn more about the rate limits for this channel here.
FAQ and Troubleshooting
Why do I get the "Template [name] does not exist..." error message even though the template has already been submitted and approved?
This error often occurs if your templates are not properly synced. First, clear your cache, then follow the steps to sync templates. This should solve the issue.
Why is my template still shown as "rejected" in respond.io when it has been approved by Meta?
If you've resubmitted a rejected template and it has been approved by Meta, you'll need to sync your message templates on respond.io. Then the latest template status will be shown.
Where can I view my API keys?
To view your API keys on respond.io, in your Workspace, click Settings > Channels > locate your 360dialog channel > Configure > API key.
Can I generate a new API key on 360dialog Hub if I signed up for WhatsApp API via Integrated Onboarding?
No, you're not able to generate a new API key or view the API key from 360dialog Hub. However, you can generate a new API key from the respond.io platform. In your workspace, go to Settings > Channels > locate your 360dialog channel > Troubleshoot > Refresh Permission.
The API key will be automatically regenerated and synced from 360dialog. Please note that you will not be able to see any changes made during this process, but once the action is complete, the WhatsApp channel should be working normally with the new API key.
Why do I see duplicate Contacts from the same WhatsApp channel?
WhatsApp passes the Contact’s phone number in a format that is different from the E.164 format that respond.io uses. This difference causes Contacts from certain countries to be duplicated. Should this occur, do reach out to us here.
